Showing posts with label battgirls. Show all posts

Tuesday, April 22, 2014

The City Quilter & Grand Central Station Centennial Quilts


Quilters Dream Batting is found exclusively at independent quilt shops and specialty quilting businesses! Please join the #BattGirls in celebrating and supporting our local quilt shops. They are the heart and soul of the quilting industry.


Nestled In the heart of Downtown Manhattan, you will find a rare jewel!

An oasis for New York City quilters and tourists alike, with over 150 classes a year, 4,000+ bolts of fabric, and a gallery displaying beautiful art quilts for sale. City Quilter's dedicated shop owners, husband and wife team, Dale Reihl and Cathy Izzo epitomize the entrepreneurial and creative spirit of NYC small business owners. 


In addition to the overwhelming duties of their shop, Cathy and Dale have taken it even a step further! With Cathy's design concepts, they have developed a fabric line inspired by 'all things New York'. Be it the spired architecture, the famous skyline, the city lights, clock towers, the lines and signs of the subway system, or the bright yellow cabs; New York City icons are artistically captured in City Quilter's beautiful unique fabric lines.


So when Dale, discovered that 2014 is the celebration of the 100th year anniversary of Grand Central Station, he knew the City Quilter had to be a part of this historic event. With creativity and inspiration flowing, Cathy went to work on designing a line of fabric that captures the grandeur, history and beauty of Grand Central Station, even down to the detail of matching the Pantone color of Grand Central's famed aqua dome celestial ceiling!


Coincidentally, Dale noticed that American Patchwork & Quilting Magazine (APQ) was celebrating their 20th anniversary. Realizing this was a perfect fit, Dale presented his idea to APQ of honoring Grand Central's Centennial with a national quilt challenge. APQ embraced the idea as did the NY Transit Museum and the Metropolitan Transportation Authority. With everyone 'on-board' the Grand Central Station Centennial National Quilt Contest began.


Using City Quilter's newly designed stunning Grand Central fabrics, eighty quilters from 20 states, submitted an array of beautiful impressionistic quilts that pay tribute and idealize Grand Central's Centennial in ways that only quilters can!
Of the eighty unique quilts entered, the top thirty finalists' quilts are on display from now until July 6 in the Grand Central Station museum.


The quilts made such an impact that NYC news, USA Today and the Wall Street Journal wrote articles featuring the event (don't you love when quilting makes the national news)!


So, if you are in New York City or planning a NYC trip, be sure to take time to add Grand Central Station's quilt exhibit to your itinerary.


From there, a shopping trip to the City Quilter quilt shop is a must. City Quilter is the only shop in the world that sells their exclusive fabric lines.

While shopping at the City Quilter... don't forget to purchase your favorite quilt batting ... because you guessed it - Quilters Dream Batting is available at The City Quilter.


Meet Dale, Cathy and their amazing staff at the City Quilter located at 133 West 26th St in the Chelsea section of Manhattan, NewYork. In addition to classes, fabrics, quilt gallery, gifts, patterns,notions and Quilters Dream Batting... City Quilter is also an authorized Bernina and Handi Quilter dealer.

Can't get to New York City? Don't worry, the fabrics are available for sale on the City Quilter website at www.CityQuilter.com and a link to City Quilter's and APQ fabulous Grand Central Quilt Exhibit is below!
www.Cityquilter.com


Wall Street JournalArticle: Piecing Together a Grand History
#cityquilter #grandcentralquilts #battgirls #quiltersdreambatting #bernina #handiquilter #AmericanPatchwork


Thursday, February 20, 2014

How to make a zippered pouch.


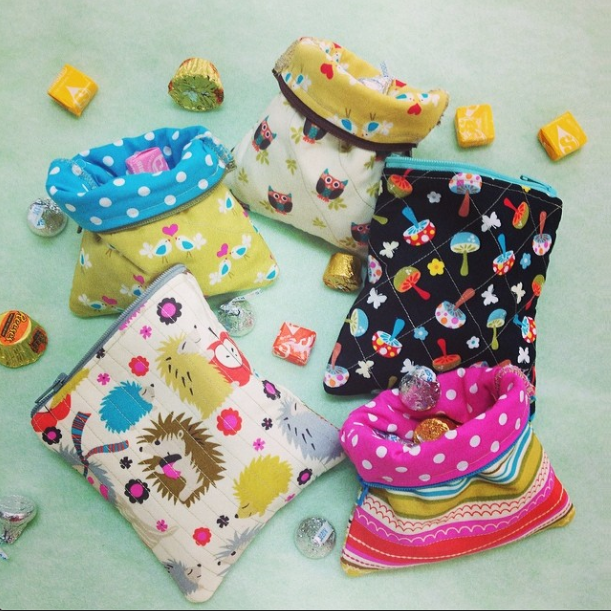
We absolutely love the zippered pouches that Jennifer made for each of us! 


In fact, we love them so much, we want to share - Jennifer has made a zippered pouch that we are giving away, with added Dream Fusion Batting that you can use for your own fun projects!


****CONTEST IS NOW CLOSED*****

Yes, it is that easy!!!
Just post your comment at the end of this blog to be entered to win!


If you aren't a winner, no worries - Jennifer wrote out instructions, so here is how you can make these adorable pouches of your own:

Supplies:


  • Coordinating Fabrics - You will cut two (2) - 5.5” x 5.5” pieces from each fabric
  • Quilters Dream Fusion - You will cut two (2) pieces - 5.5” x 5.5”
  • Zipper – 8” or longer (zipper will be cut down)
  • Thread
  • Pins
  • Scissors
  • Sewing Machine
Place your Quilters Dream Fusion batting right side up on your ironing surface and your outer pouch fabric right side up on top of the Dream Fusion Batting.
We mark the fusible side with a sticker, but if you have a scrap piece without a sticker, place the piece of Dream Fusion under a light and you will be able to see the fusible needled punched fibers as they will shine under the light.
Iron the fabric and batting to fuse them together. (Don't you love this cute little iron!!!)  It is suggested to use a steam iron on the fabric setting you are using, but as you can see, I used my mini iron and it fused nicely.
You now have two outer pieces of fabric fused to Dream Fusion batting and two pieces of coordinating lining fabric for your pouch.
Take your zipper and place it right side down on the top edge of your outer fabric.  Pin to your liking.
Take your lining fabric and place it right side down on top of your zipper, lining up the edges with your outer fabric piece.
Pin to your liking.   The zipper will be sandwiched in between the fabric.
You will now sew the three layers together, sewing as close to the zipper teeth (or chain) as possible.
Depending on your sewing machine the seam will be a little larger than a quarter of an inch.
Flip your fabrics so that your outer fabric and lining fabric join wrong sides together and pin to your liking.  Sew a 1/8th inch seam to secure your fabrics to the zipper.
This is what the lining fabric will look like after you flip it and pin.
Sew the 1/8th inch seam.
Here is what it will look like after you have sewed.
You will repeat these steps for the second side of the pouch and zipper.  Place the outer fabric face up and align the zipper face down to the top edge.
Pin the zipper to your liking and then place the lining fabric face down and pin again.
Sew the three layers together as close to the zipper teeth (or chain) as you can.
You will have a seam that is slightly larger than a quarter of an inch.
Again, you will flip the outer fabric and lining fabric so that wrong sides are together, pin to your liking, and sew a 1/8th inch seam to anchor the fabric to your zipper. 
Sewing the 1/8th seam also gives the top of the pouch a clean, finished look.
You are getting close to being finished now!  This next step you don’t want to miss because if you do – you will have a lot of “unsewing” to do and you don’t want that.  Take your zipper and open it up half way.
You will be folding the fabric so that the two outer fabric pieces are facing right sides together.  This will leave your lining fabric facing right side up – on both sides of the zipper.  Pin the three sides to your liking, trying to match up the side and bottom seams as close as possible.
Sew a ¼” seam around the three sides.  I actually started at the top where the zipper is and backstitched several times to secure the zipper.  I also sewed the ¼” seam twice just to give the pouch some additional stitch security.  After you have sewn the three sides together, you will cut the excess zipper pieces on both sides off.
I wanted to take one additional step to secure the seams, so I trimmed to 1/8” inch and then sewed a zig zag stitch around the three sides.
This seam will show inside the pouch.  By sewing the zig zag stitch it gives a clean line to the finished piece
Now you can open up the zipper and turn the pouch inside out.


Iron your little pouch to flatten out the seams and any wrinkles in the fabric.

And VOILA!  Your new little pouch is ready to be used.  You can get real creative and make quilted blocks and use those for your outer fabric, or take a page of an old telephone book or newsprint and cut to the size you like and string piece your outer fabric.  Let your imagination have fun and make multiples for your sewing bee, guild, family and friends.


Follow on Bloglovin