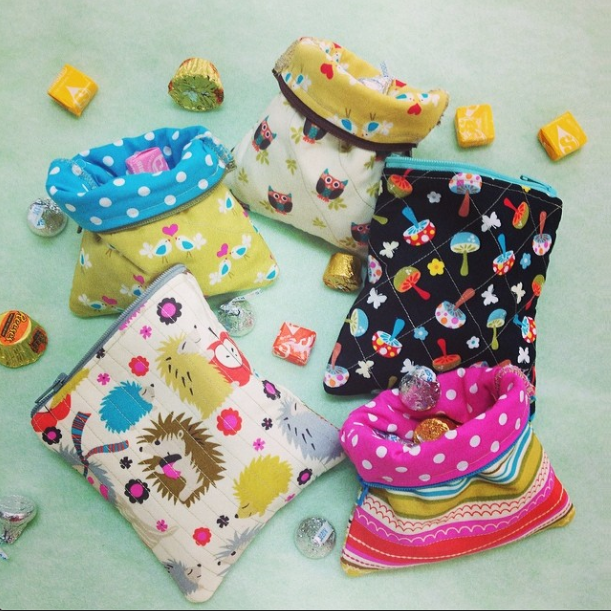
We absolutely love the zippered pouches that Jennifer made for each of us!
In fact, we love them so much, we want to share - Jennifer has made a zippered pouch that we are giving away, with added Dream Fusion Batting that you can use for your own fun projects!
****CONTEST IS NOW CLOSED*****
Yes, it is that easy!!!
Just post your comment at the end of this blog to be entered to win!
If you aren't a winner, no worries - Jennifer wrote out instructions, so here is how you can make these adorable pouches of your own:
Supplies:
- Coordinating Fabrics - You will cut two (2) - 5.5” x 5.5” pieces from each fabric
- Quilters Dream Fusion - You will cut two (2) pieces - 5.5” x 5.5”
- Zipper – 8” or longer (zipper will be cut down)
- Thread
- Pins
- Scissors
- Sewing Machine
Place your
Quilters Dream Fusion batting right side up on your ironing surface and your
outer pouch fabric right side up on top of the Dream Fusion Batting.
We mark the
fusible side with a sticker, but if you have a scrap piece without a sticker,
place the piece of Dream Fusion under a light and you will be able to see the
fusible needled punched fibers as they will shine under the light.
Iron the
fabric and batting to fuse them together. (Don't you love this cute little iron!!!)
It is suggested to use a steam iron on the fabric setting you are using,
but as you can see, I used my mini iron and it fused nicely.
You now have
two outer pieces of fabric fused to Dream Fusion batting and two pieces of
coordinating lining fabric for your pouch.
Take your
zipper and place it right side down on the top edge of your outer fabric. Pin to your liking.
Take your
lining fabric and place it right side down on top of your zipper, lining up the
edges with your outer fabric piece.
Pin to your liking. The zipper will be sandwiched in between the
fabric.
You will now
sew the three layers together, sewing as close to the zipper teeth (or chain) as
possible.
Depending on
your sewing machine the seam will be a little larger than a quarter of an inch.
Flip your
fabrics so that your outer fabric and lining fabric join wrong sides together
and pin to your liking. Sew a 1/8th
inch seam to secure your fabrics to the zipper.
This is what
the lining fabric will look like after you flip it and pin.
Sew the 1/8th
inch seam.
Here is what
it will look like after you have sewed.
You will
repeat these steps for the second side of the pouch and zipper. Place the outer fabric face up and align the
zipper face down to the top edge.
Pin the
zipper to your liking and then place the lining fabric face down and pin again.
Sew the
three layers together as close to the zipper teeth (or chain) as you can.
You will
have a seam that is slightly larger than a quarter of an inch.
Again, you
will flip the outer fabric and lining fabric so that wrong sides are together,
pin to your liking, and sew a 1/8th inch seam to anchor the fabric
to your zipper.
Sewing the
1/8th seam also gives the top of the pouch a clean, finished look.
You are
getting close to being finished now!
This next step you don’t want to miss because if you do – you will have
a lot of “unsewing” to do and you don’t want that. Take your zipper and open it up half way.
You will be
folding the fabric so that the two outer fabric pieces are facing right sides
together. This will leave your lining
fabric facing right side up – on both sides of the zipper. Pin the three sides to your liking, trying to
match up the side and bottom seams as close as possible.
Sew a ¼”
seam around the three sides. I actually
started at the top where the zipper is and backstitched several times to secure
the zipper. I also sewed the ¼” seam
twice just to give the pouch some additional stitch security. After you have sewn the three sides together,
you will cut the excess zipper pieces on both sides off.
I wanted to
take one additional step to secure the seams, so I trimmed to 1/8” inch and
then sewed a zig zag stitch around the three sides.
This
seam will show inside the pouch. By
sewing the zig zag stitch it gives a clean line to the finished piece
Now
you can open up the zipper and turn the pouch inside out.
Iron your
little pouch to flatten out the seams and any wrinkles in the fabric.
And
VOILA! Your new little pouch is ready to
be used. You can get real creative and
make quilted blocks and use those for your outer fabric, or take a page of an
old telephone book or newsprint and cut to the size you like and string piece
your outer fabric. Let your imagination
have fun and make multiples for your sewing bee, guild, family and friends.


.jpg)


