

While looking through the many Easter projects posted on Pinterest, I saw this cute bunny bag made of felt.
 |
| Bunny Bag by Merrilee - @mer-mag on Instagram |

Dream Fusion is my favorite batting because I tend to do small projects, including quilts, on my domestic Singer sewing machine.

The Dream Fusion allows me to secure the batting to my backing material and simply pin the four corners of my quilting projects and quilt away without having to worry about any pleating or puckering of my backing. You do not need to spray baste or thread baste your quilt top to your batting/backing material once the Dream Fusion is secured to your backing material. [If you like paper piecing, Dream Fusion is wonderful for securing the seams of your finished pieced quilt top!]
For this project I found a sweet spring print and fused the batting and cotton fabric. The fabric will actually be the inside of the bag and the batting will be the outside of the bag. [If you have scraps of the Quilters Dream Cotton Select, Deluxe or Supreme loft you can make these bags without of fabric lining!]

To fuse - use the Cotton STEAM setting on your iron, place the Dream Fusion on the ironing board with the fusible side up and then place your fabric right side up on top of the batting. Steam is your friend. Take your time and slowly iron the two pieces together. Once your piece cools the Dream Fusion is secure to the fabric.

Next - make your template.

I took a half of a sheet of regular typing paper and freehand the outline of the face of a bunny. Yes, the first time I drew the outline I realized the space between the bunny ears (which will not be sewn) was not going to be wide enough to place any candy in the bag when finished, thus the additional lines.

To ensure both sides were equal, I folded the paper in half and cut. I did remember to cut a 1/4" seam allowance around the the outline for sewing purposes.

When I opened up the paper template it looked much better.

Because I had a long, narrow piece of fused batting I decided to fold it in half and save myself from having to sew a bottom seam.

I placed the bottom of the paper template to the folded edge of the batting, pinned the template in place and cut.

Looks good, except I wanted it a little wider at the opening between the ears.

No problem - just trim the template and batting from the inside of the two ears.

Much better!
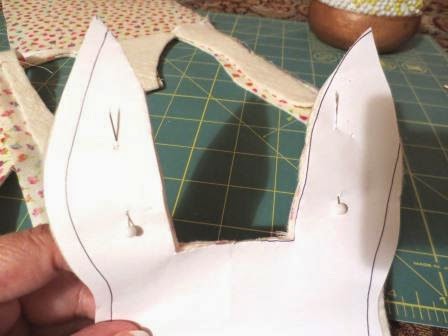
Remove the pins and paper template and open up your fused fabric piece.

Take a piece of your scrap fused fabric and cut out a triangle. With a zigzag or decorative stitch sew the triangle piece of fabric on the batting side as a nose for your bunny's face. You will also want to stitch a solid line about 3/4" of an inch from the bottom point of the nose to act as the mouth. If your machine has a decorative stitch that looks like a filled in circle, use that to sew two eyes just above the fabric nose or add buttons for eyes.
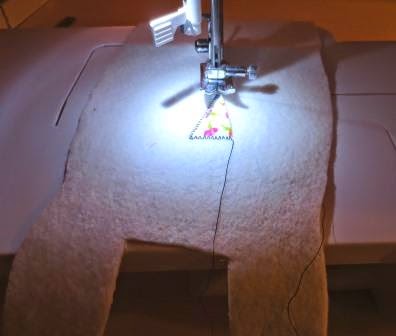
You are almost done! Fold the piece in half with the batting facing right sides together. This will mean your fabric is on the outside.

Start at the inside edge of one of the bunny ears and sew all the way around the template. You will want to back stitch your first few stitches and your last few stitched to secure your sewing. While I had folded the fabric at the bottom and didn't need to stitch, I was on a roll and just kept sewing until I reached the inside edge of the second ear.

You will leave the space between the ears open. Now, turn the bunny bag right side or batting side out.

Give the bag one more good steam press with the iron.

Fill with candy.

Take a strip of your fabric or some ribbon and tie a bow at the top and voila! A fun Easter gift to share with others.

I made two, one for our sweet U.S. Postal Service man, seen here with one of my fellow #battgirls - Neva...

...and the second for our wonderful UPS man.

So grab your scraps of batting and give your hand a try at making several of these bags. It really is a quick project and sure to bring a smile to your family and friends (or even your Postman/woman!).
Wishing you and yours a Happy Easter!


